프로젝트 기본 사항
- Java 11
- Spring Boot 2.4.3
- Gradle
1. build.gradle
spring security와 oauth2를 등록해줬다.
spring-boot-:spring-boot-starter-oauth2-resource-server를 사용하고 싶었으나 포기..
- Spring WebFlux방식을 사용한다고 한다..
jaxb관련 라이브러리들은 Java9버전? 이상에서 발생하는 오류 때문에 넣어주었다.
dependencies {
    implementation 'org.springframework.boot:spring-boot-starter-web'

    // Sprint Security
    implementation 'org.springframework.boot:spring-boot-starter-security'
    // OAuth2
    implementation group: 'org.springframework.security.oauth', name: 'spring-security-oauth2', version: '2.3.5.RELEASE'
    // MyBatis
    implementation 'org.mybatis.spring.boot:mybatis-spring-boot-starter:2.1.4'

    // JSON String-> Java Object
    implementation 'com.google.code.gson:gson'

    // Java 11 exception 해결
    compile group: 'javax.xml.bind', name: 'jaxb-api', version: '2.3.1'
    compile group: 'org.glassfish.jaxb', name: 'jaxb-runtime', version: '2.3.1'

    compileOnly 'org.projectlombok:lombok'

    // MySQL
    runtimeOnly 'mysql:mysql-connector-java'
    annotationProcessor 'org.projectlombok:lombok'
    testImplementation 'org.springframework.boot:spring-boot-starter-test'
    testImplementation 'org.springframework.security:spring-security-test'
}2. application.yml
port번호를 변경해주었고, DB설정을 해주었다.
server:
  port: 8081
spring:
  devtools:
    livereload:
      enabled: true
  datasource:
    hikari:
      driver-class-name: com.mysql.cj.jdbc.Driver
      jdbc-url: jdbc:mysql://localhost:3306/[데이터베이스 명]?serverTimezone-UTC&chracterEncoding=UTF-8
      username: [유저 명]
      password: [비밀번호]
+ DB 및 MyBatis 설정 까지는 이전 글 참고
3. OAuth2 권한 서버 설정
@EnableAuthorizationServer 어노테이션은 OAuth2의 인증 처리 권한을 갖는 서버로 사용하겠다는 뜻
/oauth/token 과 /oauth/authorize를 포함한 여러 endpoints가 자동으로 생성 됨 (아래 참고)
우선 테스트를 위해 inMemory방식으로 클라이언트를 작성해주었다.
@Configuration
@EnableAuthorizationServer    // OAuth2 권한 서버
public class Oauth2AuthorizationConfig extends AuthorizationServerConfigurerAdapter {

    @Override
    public void configure(ClientDetailsServiceConfigurer clients) throws Exception {
        clients.inMemory()
                .withClient("clientId") // 클라이언트 아이디
                .secret("{noop}clientSecret") // 클라이언트 시크릿
                .redirectUris("http://localhost:8081/oauth2/callback")
                .authorizedGrantTypes("authorization_code")
                .scopes("read", "write")    // 해당 클라이언트의 접근 범위
                .accessTokenValiditySeconds(60 * 60 * 4)            // access token 유효 기간 (초 단위)
                .refreshTokenValiditySeconds(60 * 60 * 24 * 120);   // refresh token 유효 기간 (초 단위)
    }
}
4. Security 관련 설정
user또한 우선 inMemory방식으로 설정했다.
/oauth/**와, 위에서 설정한 redirectURI값인 /oauth2/callback은 모두 접근 가능하도록 설정.
해당 URI는 나중에 사용하지 않을 수도 있다.
굳이 똑같이 따라할 필요는 없고,anonmymous().disable()과authoriaeRequests().anyRequest().authenticated()설정을 해주는 것도 좋다.
@Configuration
@EnableWebSecurity
public class SecurityConfig extends WebSecurityConfigurerAdapter {

    @Override
    protected void configure(AuthenticationManagerBuilder auth) throws Exception {
        auth.inMemoryAuthentication()
                .withUser("victor")
                .password("{noop}oladipo")
                .roles("USER");
    }

    @Override
    protected void configure(HttpSecurity http) throws Exception {
        http.csrf().disable()
            .headers().frameOptions().disable()
            .and()
            .authorizeRequests().antMatchers("/oauth/**", "/oauth2/callback").permitAll()
            .and()
            .formLogin().and()
            .httpBasic();
    }
}
여기까지 진행했으면 실행!
http://localhost:8081/oauth/authorize?client_id=&redirect_uri=&response_type=code&scope=read
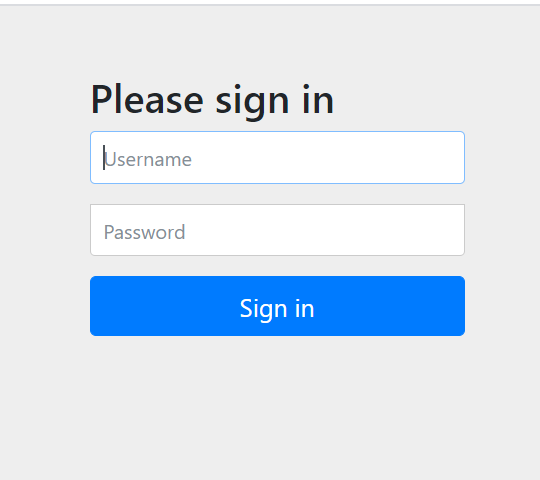
이 주소에 알맞은 값을 넣은 뒤 들어가보면 스프링 시큐리티에서 기본적으로 만들어주는 로그인 화면이 등장한다.
위에서 설정한 user값으로 로그인 해보면

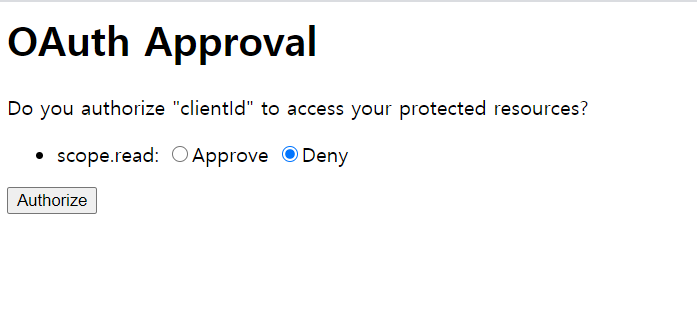
scope.read: Approve 선택 후 Authorize 버튼 클릭

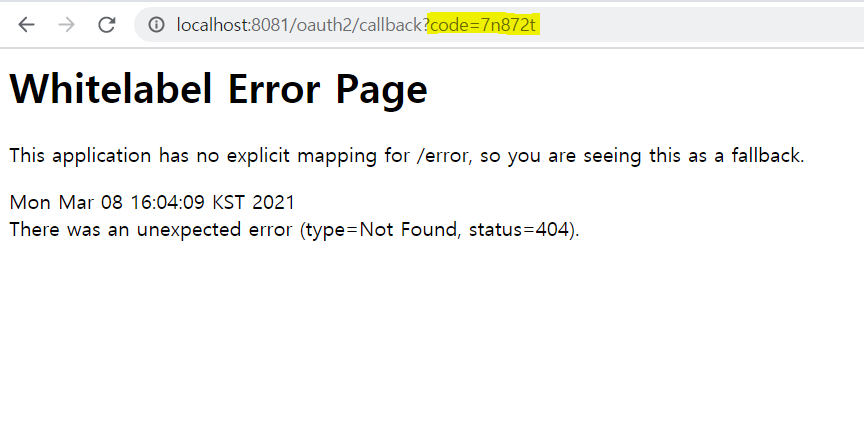
현재 RedirectURI에 맞는 코드를 작성하지 않은 상태라 404에러가 뜬다.
저 code부분을 통해 access token을 발급받을 수 있다. (위에서 grantTypes설정에 "authorization_code"를 해줬기 때문)

5. WebMvcConfig
작성하지 않아도 됩니다. PasswordEncoder를 SecurityConfig클래스에서 Bean으로 등록해주세요.
@Configuration
public class WebMvcConfig implements WebMvcConfigurer {

    private static final long MAX_AGE_SECONDS = 3600;

    @Bean
    public RestTemplate getRestTemplate() {
        return new RestTemplate();
    }

    @Bean
    public PasswordEncoder passwordEncoder() {
        return PasswordEncoderFactories.createDelegatingPasswordEncoder();
    }
}
createDelegatingPasswordEncoder()는 비밀번호 앞에 중괄호({})안에 설정된 암호화 종류를 인식하는 방법이다.
비밀번호 앞에 {sha256}이 붙어있으면 그 방식의 패스워드인코더를 사용하는 것!
읽어보기: https://java.ihoney.pe.kr/498
6. Access Token발급
위에서 생성된 code값을 이용해 Access Token을 발급받아 보기..
/oauth/token은 OAuth2사용하면서 자동으로 생성되는 endpoint다.
@Slf4j
@RequiredArgsConstructor
@RestController
@RequestMapping("/oauth2")
public class OAuth2Controller {

    private final RestTemplate restTemplate;

    @GetMapping(value = "/callback")
    public void callback(@RequestParam String code) {
        log.info("Request param cde = " + code);

        String credentials = "clientId:clientSecret";
        String encodedCredentials = new String(Base64.encodeBase64(credentials.getBytes()));

        HttpHeaders headers = new HttpHeaders();
        headers.setContentType(MediaType.APPLICATION_FORM_URLENCODED);
        headers.add("Authorization", "Basic " + encodedCredentials);

        MultiValueMap<String, String> params = new LinkedMultiValueMap<>();
        params.add("code", code);
        params.add("grant_type", "authorization_code");
        params.add("redirect_uri", "http://localhost:8081/oauth2/callback");

        HttpEntity<MultiValueMap<String, String>> request = new HttpEntity<>(params, headers);

        ResponseEntity<String> response
                = restTemplate.postForEntity("http://localhost:8081/oauth/token", request, String.class);

        if(response.getStatusCode() == HttpStatus.OK) {
            JSONObject jsonObject = new JSONObject(response.getBody());
            log.info(jsonObject.toString());
        }else {
            log.info(response.getStatusCode().toString());
        }

    }

}
+) 참고
'STUDY > Spring' 카테고리의 다른 글
| Spring Boot | Spring Security OAuth2 (3) JDBC방식으로 바꾸기 (0) | 2021.03.09 |
|---|---|
| Spring Boot | Spring Security OAuth2 (2) grant_type password, postman / Curl로 테스트 (0) | 2021.03.09 |
| Spring Boot | Swagger2 사용 (springfox-boot-starter:3.0.0) (0) | 2021.03.05 |
| Spring Boot | MyBatis 연동 (0) | 2021.03.04 |
| Spring Boot | REST API 만들기 ( + IntelliJ Lombok추가) (0) | 2021.03.04 |


