Spring Boot File Upload / Download Rest API Example
Uploading and downloading files are very common tasks for which developers need to write code in their applications. In this article, You'll learn how to upload and download files in a RESTful spring boot web service. We'll first build the REST APIs for up
www.callicoder.com
1. multipart관련 사용 설정
application.properties나 application.yml에 multipart file 관련 설정들(크기 설정, upload 경로 등)을 해준다.
일단은 경로 설정만 하기로 함.. 파일들을 저장할 경로를 작성해주면 됨. 이 설정 값은 자동 configuration되지 않는다.
# application.yml

file:
  upload:
    location: /Users/유저네임!/Desktop


# application.properties

file.upload.location=/Users/유저네임!/Desktop
2. Properties 설정
@ConfigurationProperties(prefix = "...")는 어플리케이션이 시작될 때 application.yml또는 application.properties에 설정된 file.upload~로 시작하는 설정값을 가져옴..! getter와 setter를 통해 location이라는 변수에 우리가 설정한 값이 지정된다.
/* application.yml에 설정한 파일 업로드 경로를 가져옴 */
@ConfigurationProperties(prefix = "file.upload")
public class FileUploadProperties {

    private String location;

    public String getLocation() {
        return location;
    }

    public void setLocation(String location) {
        this.location = location;
    }
}
그리고 SpringBoot가 실행되는 곳에 properties가 설정되도록..
@SpringBootApplication과 함께 적는다... 스프링 부트 어플리케이션이 실행됨과 동시에 위에서 설정한 properties 값들도 설정된다.
@EnableConfigurationProperties(
        {FileUploadProperties.class}
)
@SpringBootApplication
public class BootApplication {

    public static void main(String[] args) {
        SpringApplication.run(BootApplication.class, args);
    }

}
3. Controller작성
컨트롤러는 자유롭게... 최상단의 링크를 참고해서 작성하면 좋다.
일단 파일을 업로드하고 다운받을 수 있는 두 가지를 작성함
@Slf4j
@RestController
public class FileController {

  @PostMapping(value = "/upload")
  public ResponseEntity<?> uploadFile(MultipartFile file) {
    if(file.isEmpty()) {
    	/* 파일을 업로드 하지 않았을 경우 처리 */
    }

    return new ResponseEntity.ok();
  }

  @GetMapping(value = "/download")
  public ResponseEntity<?> downloadFile(String fileName) {
  	return new ResponseEntity.ok();
  }

}
4. FileService작성
실제로 upload하고 resouce를 반환해 다운로드 할 수 있게 해주는 부분
파일 업로드 경로를 설정
    private final Path dirLocation;

    @Autowired
    public FileService(FileUploadProperties fileUploadProperties) {
        this.dirLocation = Paths.get(fileUploadProperties.getLocation())
                .toAbsolutePath().normalize();
    }

    @PostConstruct
    public void init() {
        try {
            Files.createDirectories(this.dirLocation);
        } catch (IOException e) {
            e.printStackTrace();
        }
    }
saveFile메서드에서 Files.copy메서드를 이용해 설정한 경로로 파일을 업로드한다.
public String saveFile(MultipartFile multipartFile) {

  String fileName = multipartFile.getOriginalFilename();
  Path location = this.dirLocation.resolve(fileName);
  try {
    /* 실제 파일이 upload 되는 부분 */
    Files.copy(multipartFile.getInputStream(), location, StandardCopyOption.REPLACE_EXISTING);
  } catch (IOException e) {
  	e.printStackTrace();
  }

  return fileName;
}
loadFile메서드는 파일명으로 파일을 찾아 resource를 반환함
    public Resource loadFile(String fileName) throws FileNotFoundException {

        try {
            Path file = this.dirLocation.resolve(fileName).normalize();
            Resource resource = new UrlResource(file.toUri());

            if(resource.exists() || resource.isReadable()) {
                return resource;
            }else {
                throw new FileNotFoundException("Could not find file");
            }
        } catch (MalformedURLException e) {
            throw new FileNotFoundException("Could not download file");
        }

    }
5. 컨트롤러 수정
@Slf4j
@RestController
public class FileController {

  @PostMapping(value = "/upload")
  public ResponseEntity<?> uploadFile(MultipartFile file) {
    if(file.isEmpty()) {
    	/* 파일을 업로드 하지 않았을 경우 처리 */
    }

    String downloadURI = ServletUriComponentsBuilder.fromCurrentContextPath()
                                                    .path("/download/")
                                                    .path(fileName)
                                                    .toUriString();

    return new ResponseEntity<>(downloadURI, HttpStatys.OK);
  }

  @GetMapping(value = "/download")
  public ResponseEntity<?> downloadFile(String fileName) {

  	Resource resource = fileService.loadFile(filename);

        String contentType = null;
        try {
            contentType = request.getServletContext().getMimeType(resource.getFile().getAbsolutePath());
        } catch (IOException ex) {
            log.info("Could not determine file type.");
        }

        // Fallback to the default content type if type could not be determined
        if(contentType == null) {
            contentType = "application/octet-stream";
        }
        return ResponseEntity.ok()
                .contentType(MediaType.parseMediaType(contentType))
                .header(HttpHeaders.CONTENT_DISPOSITION, "attachment; filename=\"" + resource.getFilename() + "\"")
                .body(resource);
  }

}
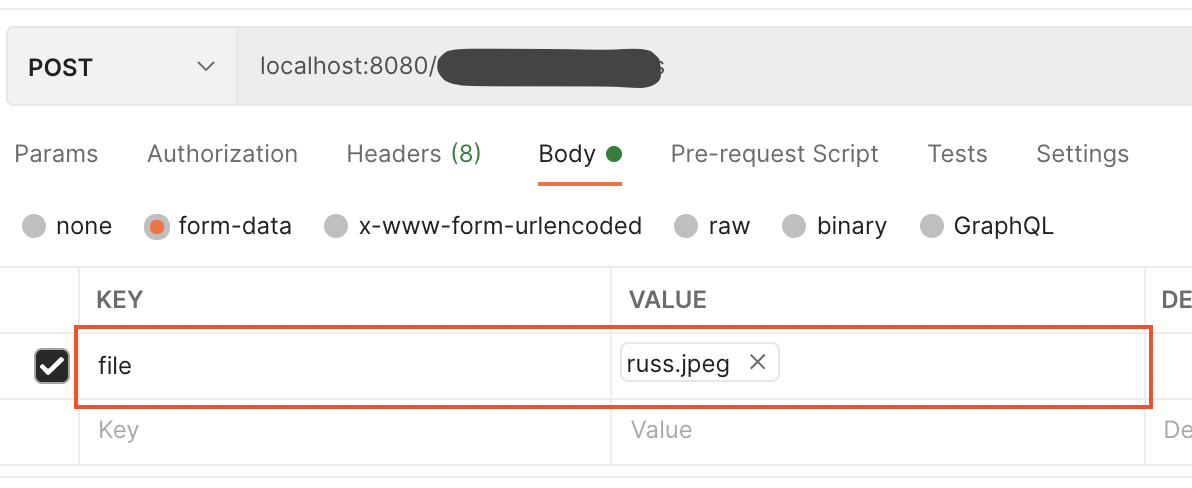
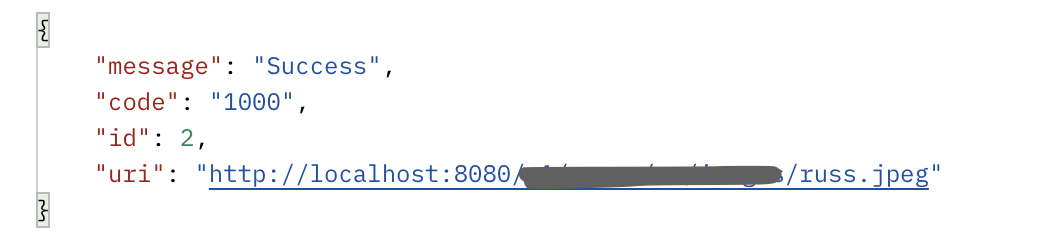
6. 테스트!
postman에서 form-data의 key입력부분에서 file을 선택하고, 이미지를 첨부함
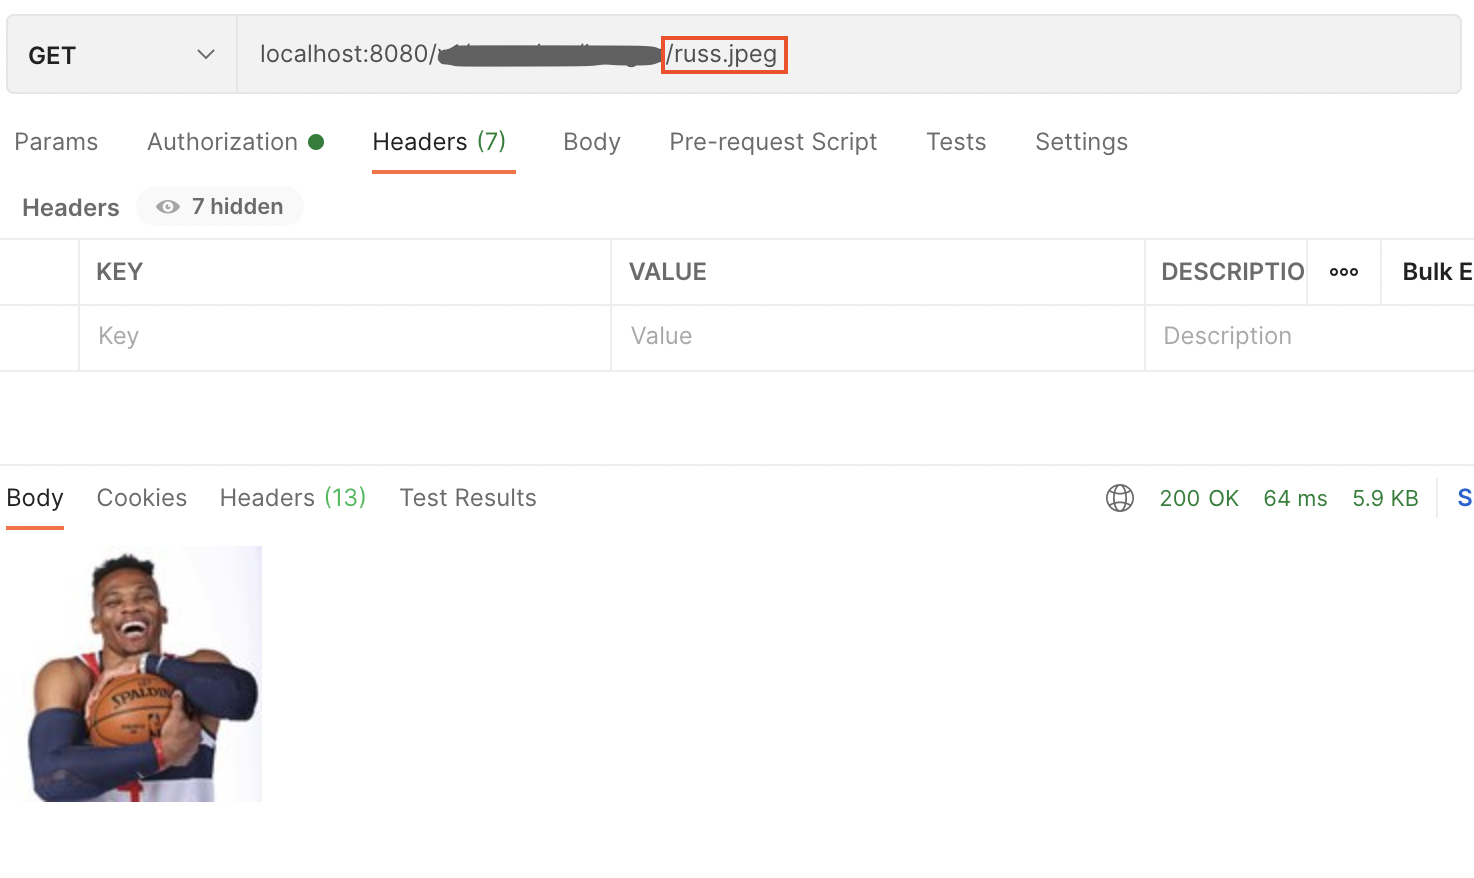
해당 URI로 요청하면 업로드한 사진이 잘 뜬다,,,
'STUDY > Spring' 카테고리의 다른 글
| Spring Boot | Exception만들기 (0) | 2021.03.29 |
|---|---|
| Spring Boot | Spring Security @PreAuthorize사용하기 (0) | 2021.03.26 |
| Spring Boot | @ControllerAdvice로 Exception 처리하기 (0) | 2021.03.19 |
| Spring Boot | 유효성 검사 직접 만들기! (Custom Constraint) (0) | 2021.03.17 |
| Spring Boot | spring-boot-starter-validation (2) | 2021.03.16 |


